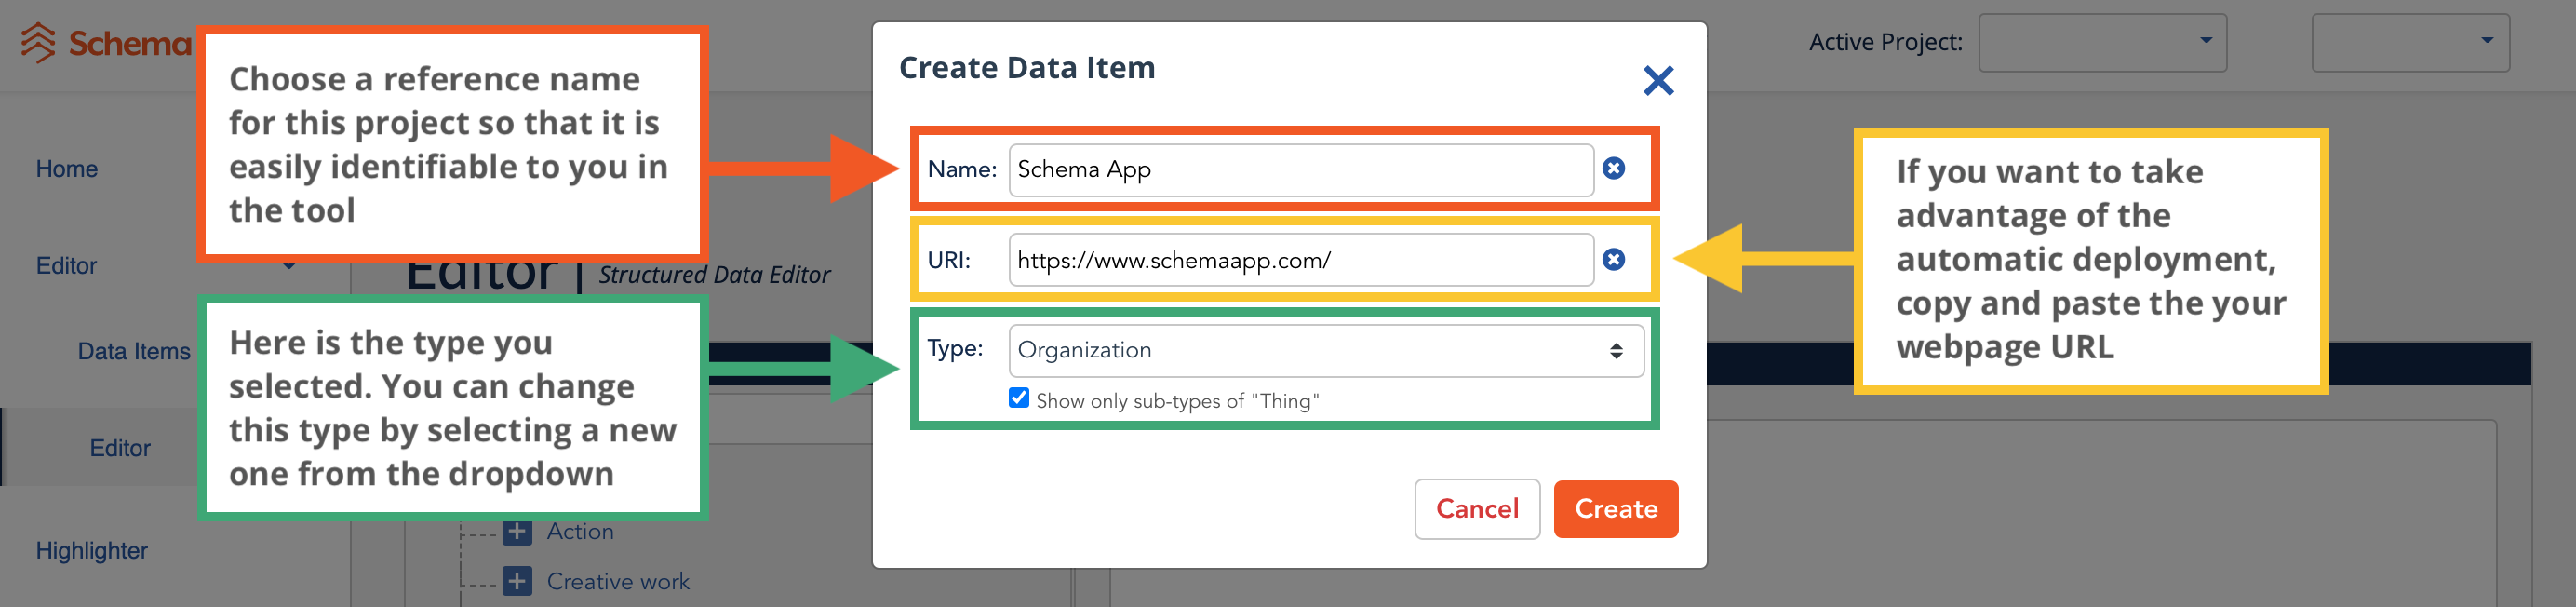
Name: Select a name that’ll be easy for you to find. This will be your reference name.
1. Create and Name
A. Choose the primary schema.org type (aka “Class”, “Entity” or “Data Type”)
The Editor contains the entire schema.org vocabulary plus extensions but in the interest of making the tools peppy, only the standard vocabulary is automatically loaded without requiring additional action. With a few quick clicks, you can activate the extensions (including pending types).
Choose one primary type per page. The more specific you can be in choosing your primary type, the better.
You can either use the Editor’s type tree or start typing in the type name.
If you are having trouble choosing the appropriate type, reference schema.org – their definitions will help you to select the best option.

B. Choose a reference name and URL
Agencies: We recommend using the name of the client and a description of what you’re optimizing. e.g. ABC Company/HomePage
URL: This is a unique identifier. Normally this is the webpage URL, but when you have multiple data items that reference the same page URL, you will need to append a unique ID. Add a “#” to the URL plus text to describe your data item. When it comes to deploying the schema markup, the WordPress plugin, Google Tag Manager or JavaScript API (for example) will use this to identify what it is updating so that it can pull in the appropriate markup.
2. Mark up Content
No need to write code with the Schema App Editor, simply “Edit” your newly created data item and fill in the fields. At a minimum, mark up all of the required and recommended fields to achieve the best SEO results BUT only mark up content that is displayed/visible on the page (OR update your page to add the content, so that it can be marked up). Not all fields need to be filled in – just those that are impactful to your business. It is more important to supply fewer but complete and accurate properties rather than trying to provide every possible property with less complete, badly-formed, or inaccurate data.
The Schema App Editor will load all of the Google required, recommended and other properties associated with the class you’ve chosen.
Adding the required properties will make you eligible for rich results. Populating recommended fields will make it more likely that your information can appear in Search results with enhanced display. The Editor will autosave so you never need to worry about saving your changes.
To fill in the blanks in the Schema App Editor form, choose from the list of options:
- Type text and/or numbers
- Copy & paste text or links
- Create a Data Item (Schema App will propose appropriate schema.org types)
- Link to an existing Data Item (if one has been created)
- Link to Wiki

3. Creating an Embedded Data Item
There is an excellent chance that you’ll have to create at least one embedded Data Item and when you do, the Editor will prompt you to name it and give it a URL. You’ve already used the URL the content resides on for the primary type, but you can simply add a hashtag plus a description to the end of the URL to create a unique URL for this data item.
The Schema App Editor will automatically connect your embedded Data Item to your primary Data Item and in doing so, will help you to build out a Knowledge Graph.

4. Test Quality of Markup
Test completeness of markup with Google’s Structured Data Testing tool.
About "Data Items"
Sometimes the value of a property is a type/class with its own set of properties.
Example:
- A “Blog” (type/class) would have an “author” (which is a property of a “Blog”)
- The “author” might be a “Person” (also a type/class).
- “Person” would have its own properties (e.g. birthDate, children and alumniOf), and a person might also be an
- “AlumniOf” (also a type/class) a specific university, which might link to an
- EducationalOrganization (also a type/class with its own set of properties).
- “AlumniOf” (also a type/class) a specific university, which might link to an
- “Person” would have its own properties (e.g. birthDate, children and alumniOf), and a person might also be an
- The “author” might be a “Person” (also a type/class).
Schema App allows you to easily link all of these schema app types.
Creating a data item will:
- Give you the opportunity to fill in all of the properties associated with the schema.org type.
- Make it easier for you to reuse the information. For instance, “ContactPoint” might be a property of your “Organization” type as well as your “Person” type but you only need to create the Data Item once and then you can reference it multiple times.
- Connect your data to:
- Build a Knowledge Graph
- Make your website easier to crawl
Name the data item:
- Choose any descriptive name for the Data Item that makes sense to you. You’ll want to make sure that you can isolate it from the list that you’ll create.
- Add a “#” followed by additional text, to differentiate similar additional Data Items that share the same URL.
Main Entity of Page
Use the schema.org property, mainEntityOfPage when you want to define the primary topic of a page, particularly in cases where it might not be clear. Each page you mark up should have one primary schema.org type.
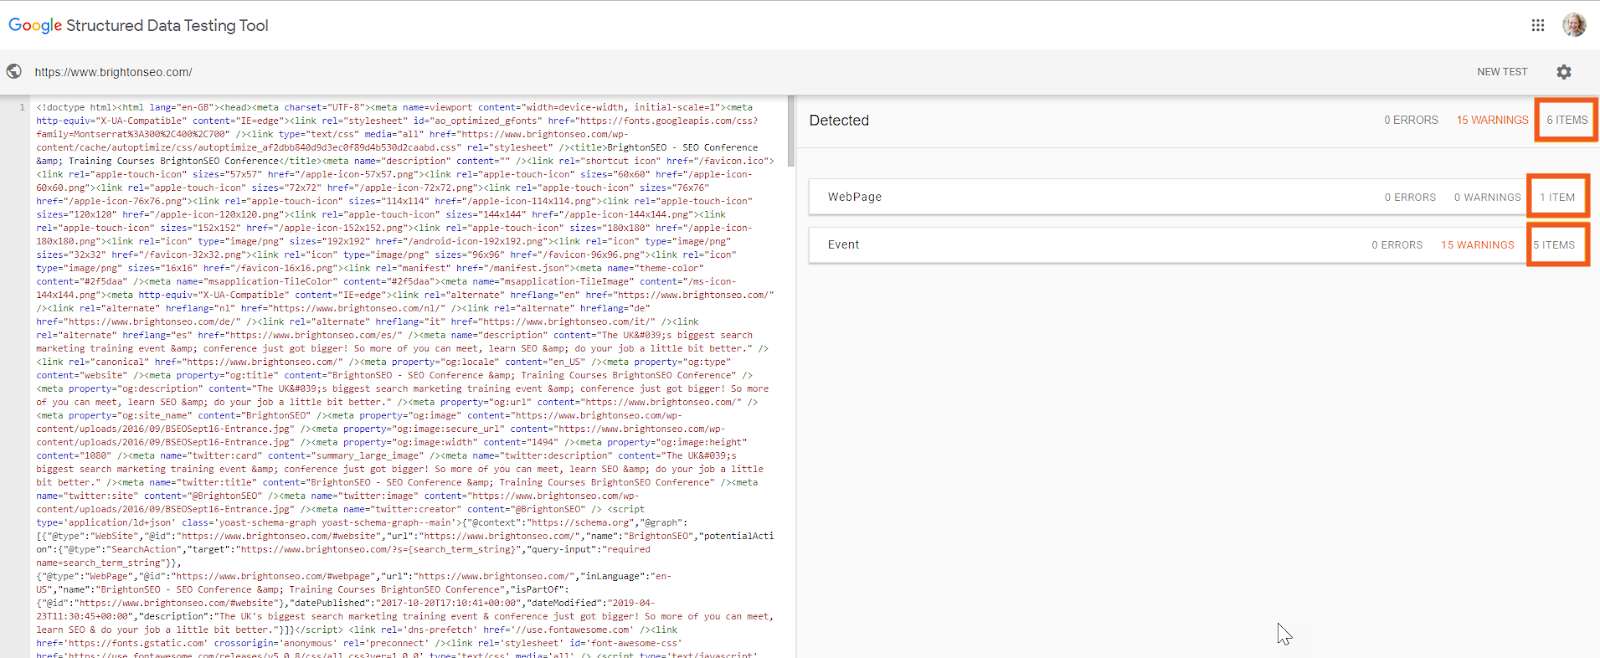
In our example, by incorporating a specific URL into the schema.org property, “mainEntityofPage”, you are telling Google that even though there are many events on a page, this is the primary topic of the page.

Multi-Entity Schema
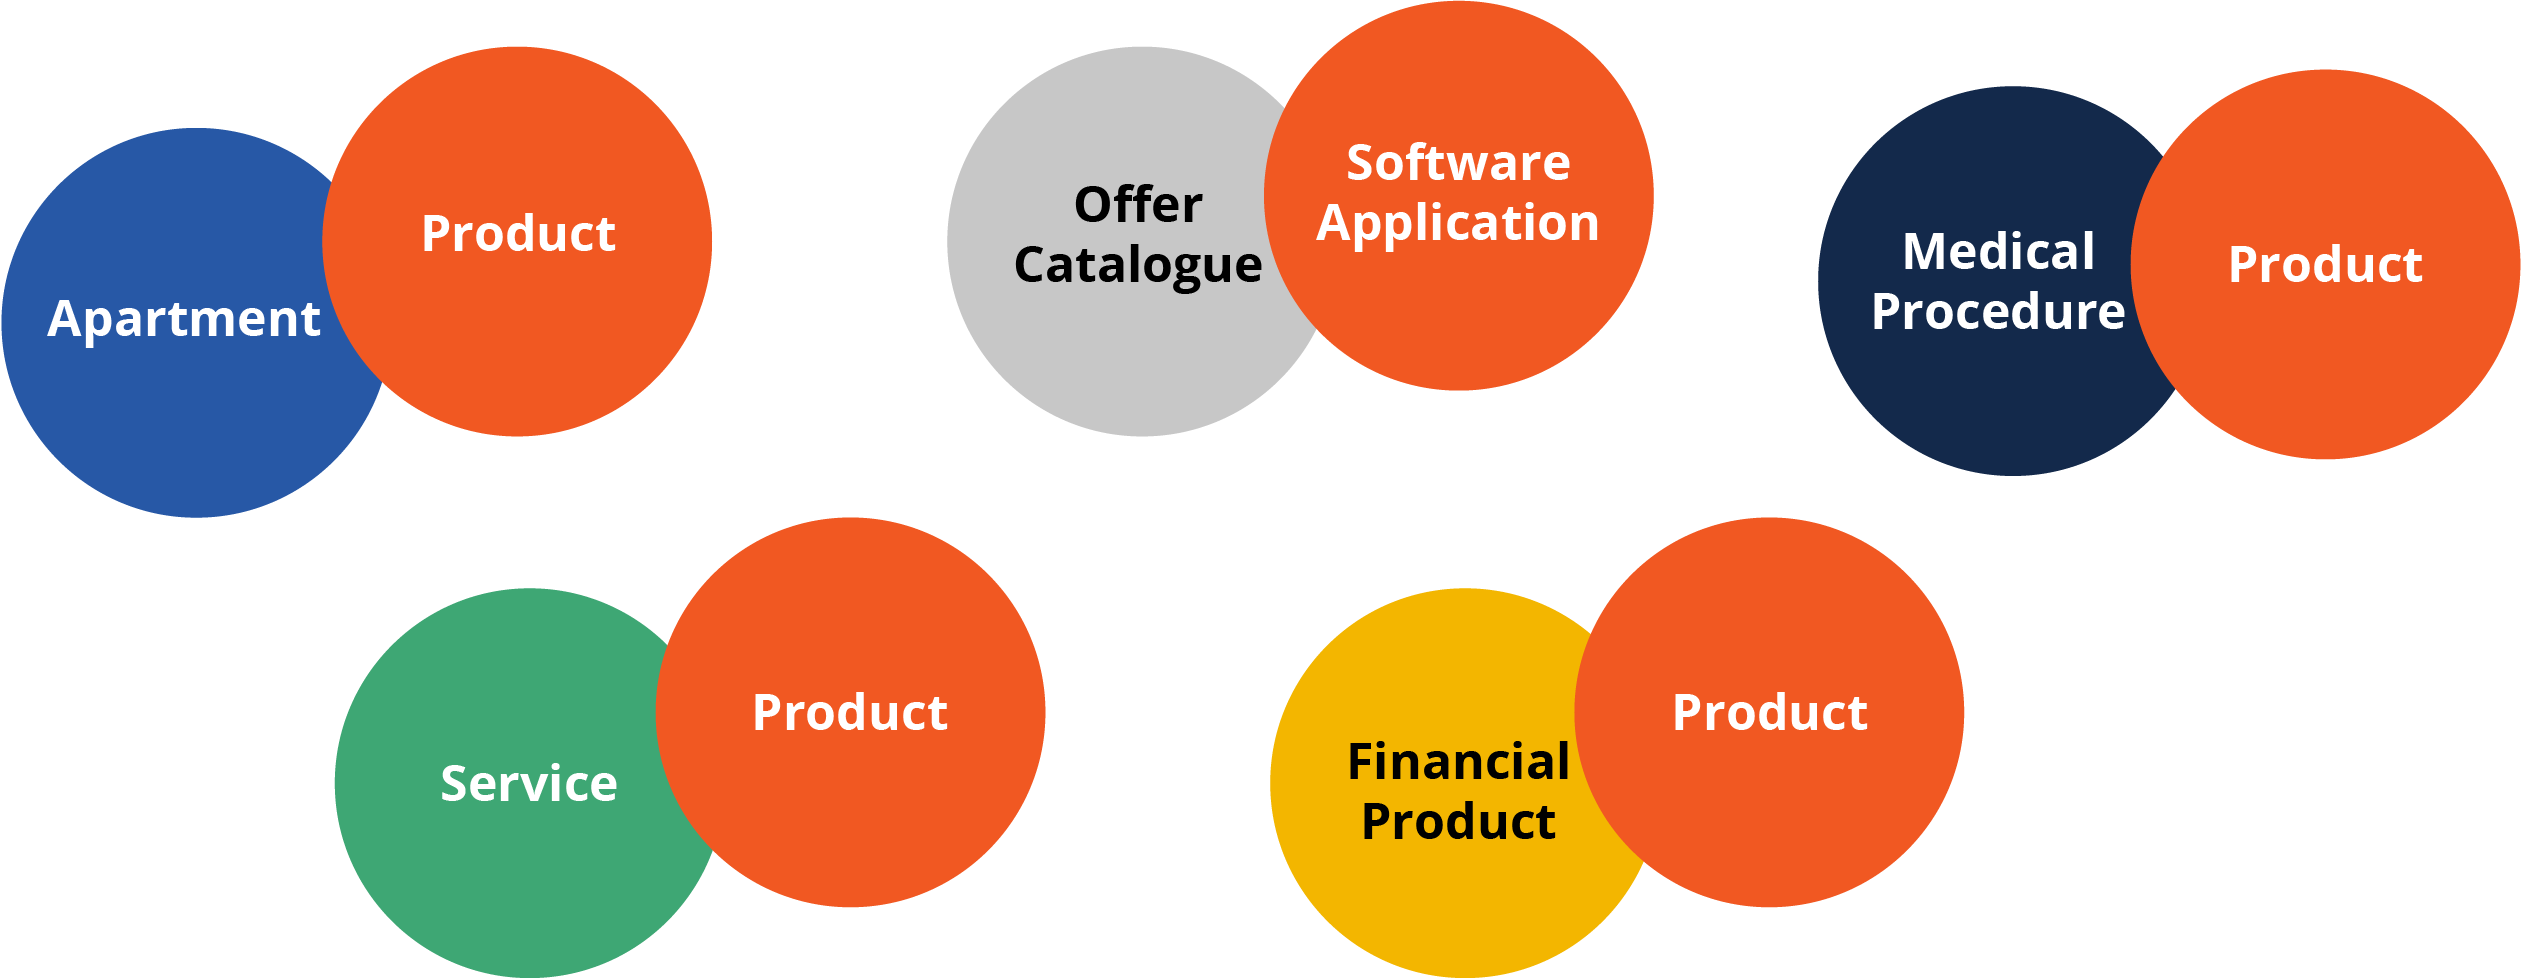
If it makes sense, you can double up on your schema.org types, not only to provide additional clarity to the search engines on what you are describing but also to pull in additional properties and possibly even qualify for a rich result. Choose the schema.org type/class that best describes the page you are marking up.
Multi-type entities might include a page about a Car that is also a Product, or a SingleFamilyResidence that is also a Product and in rare cases, it could even be about a service that is also a product, but generally speaking, any service that has an offer (i.e. a price) should be marked up as a Product from a schema.org perspective (e.g. a haircut).
All other content that you want to mark up on the page should be set up as a nested data item below the primary schema.org type. Structuring your markup in this way provides clarity to the search engines regarding the primary topic of your page. If you have a lot of content on a page and you aren’t sure how to label it, consider using the CollectionPage schema.org type and then nesting the other types below that using properties like subjectOf and hasPart.
"additionalType" Property
The “additionalType” property is available for “Things” and allows you to add a URL to provide further clarity on what you are describing so you can get really specific on the thing you are describing.
| To further describe | Schema.org type | + additionalType |
| Orthodontist | Dentist | https://en.wikipedia.org/wiki/Orthodontics |
| Gastro Pub | BarOrPub | https://en.wikipedia.org/wiki/Gastropub |
| Tonsillectomy | MedicalProcedure | https://en.wikipedia.org/wiki/Tonsillectomy |
About "Wikipedia"
Although the schema.org vocabulary is extensive, it doesn’t provide specific clarity for everything and this is where making a reference to Wikipedia or Wikidata can be helpful. Examples:
- “City” could be specifically identified as https://en.wikipedia.org/wiki/San_Francisco
- “MedicalProcedure” could be further defined as https://en.wikipedia.org/wiki/Cholecystectomy
- A company that delivers services around Artificial Intelligence (AI) could specifically define them as https://en.wikipedia.org/wiki/Artificial_intelligence
Wikipedia and Wikidata are trusted sites with definitions of things and can help bring clarity on what you are talking about or referring to. Because Wikidata was created for machines if given the option, choose to reference Wikidata over Wikipedia.
About "Additional Property"
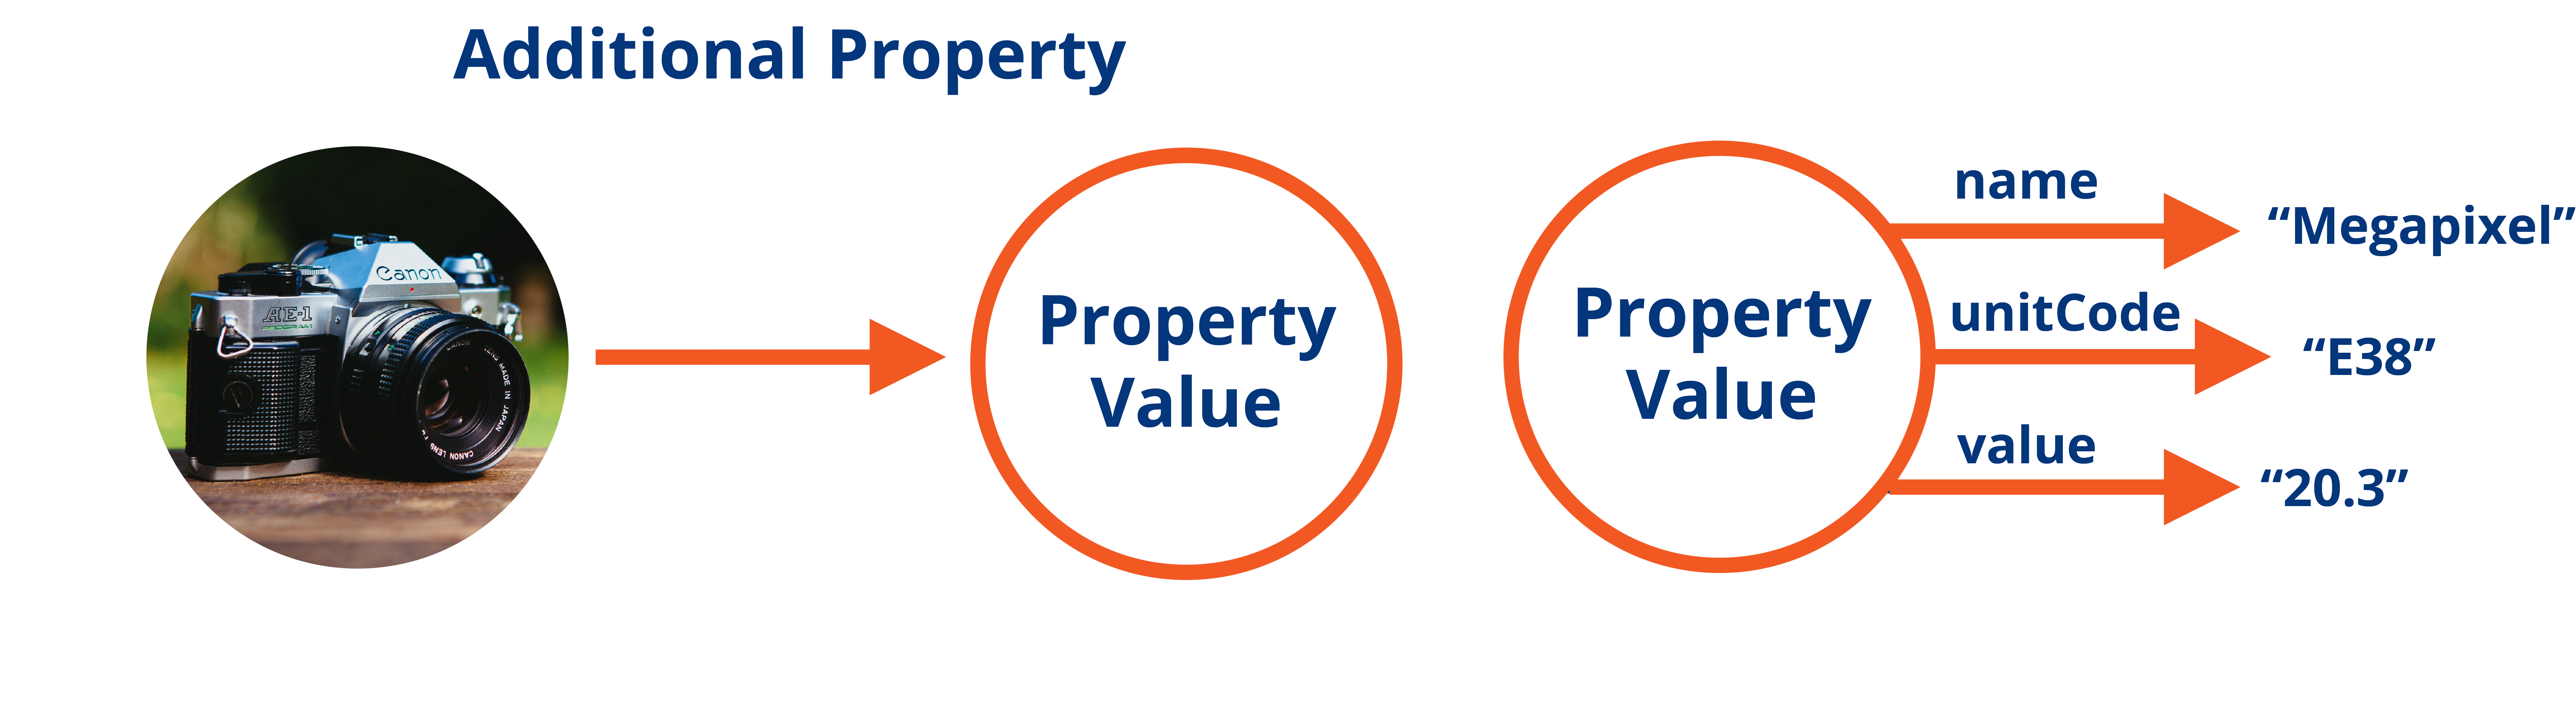
There are times that you want to connect additional information to a product or a place and there is no schema.org property that fits. (e.g. shoe size or megapixels for a camera). This is where you can use Additional Property.
In our example, we wanted to mark up the Megapixels and associate it with a camera. Use “AdditionalProperty” and associate it to a “PropertyValue” entity. Within the PropertyValue there are set fields you can use, like name, value as well as others such as UnitCode that allow you to define the free variable more clearly. In our example, we set the “name” to, “Megapixel”, the “value” to “20.3” and then used the UN/CEFACT unitcode to define it more clearly.
Connecting your Schema Markup
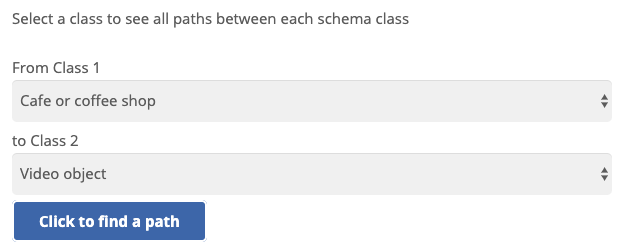
Trying to create linkages between your content to augment your Knowledge Graph (which improves understanding and therefore findability) can be difficult. This is why Schema App creator, Mark van Berkel, created a free tool called Schema Paths. Schema Paths allows you to choose two classes on a page to uncover the possibilities of how you can relate them to one another.
Example 1:
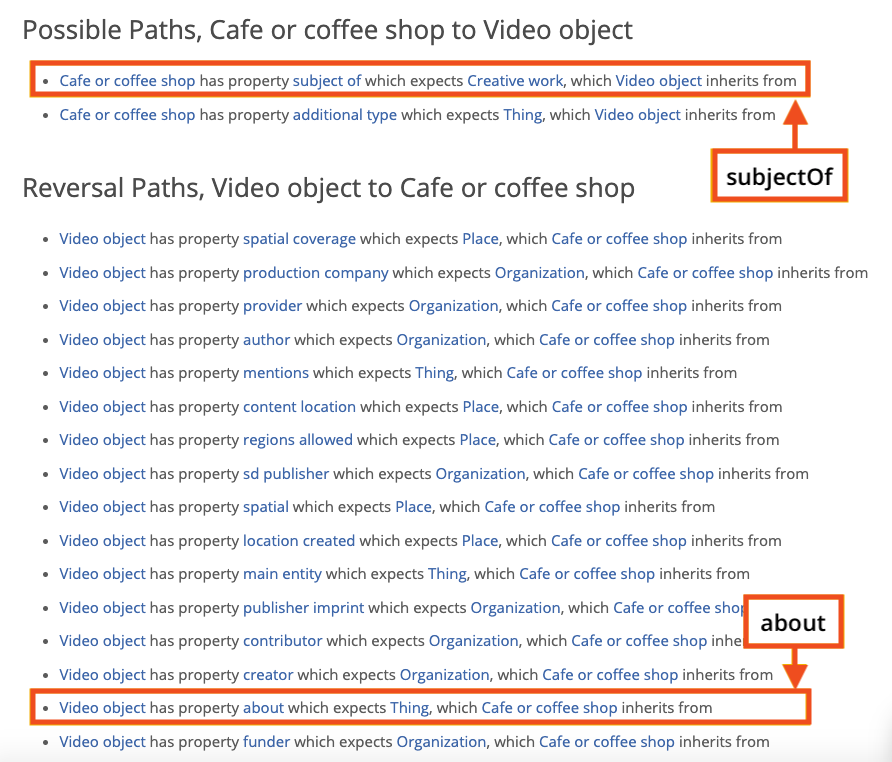
If you wanted to relate a cafe or coffee shop with a videoObject, you would select both of these paths in the Schema Paths tool.
The output (below) shows us how these two classes can be linked together. While there are many options, you should select the most specific one. In our example, the best option would be to use “subjectOf” to relate the coffee shop to the video. In essence, we are saying, the subjectOf this video is this coffee shop”.
Example 2:
In this example, we are trying to find a linkage between a Product and a VideoObject. We have chosen to link to the VideoObject from the Product page by using the “subjectOf” property. To do this, search for “subjectOf” in your Product properties and link to a new data item for VideoObject” or create a new data item for the video.

Learn more about how to use Schema Paths here.
Training by schema.org type
Was this article helpful?
That’s Great!
Thank you for your feedback
Sorry! We couldn't be helpful
Thank you for your feedback
Feedback sent
We appreciate your effort and will try to fix the article